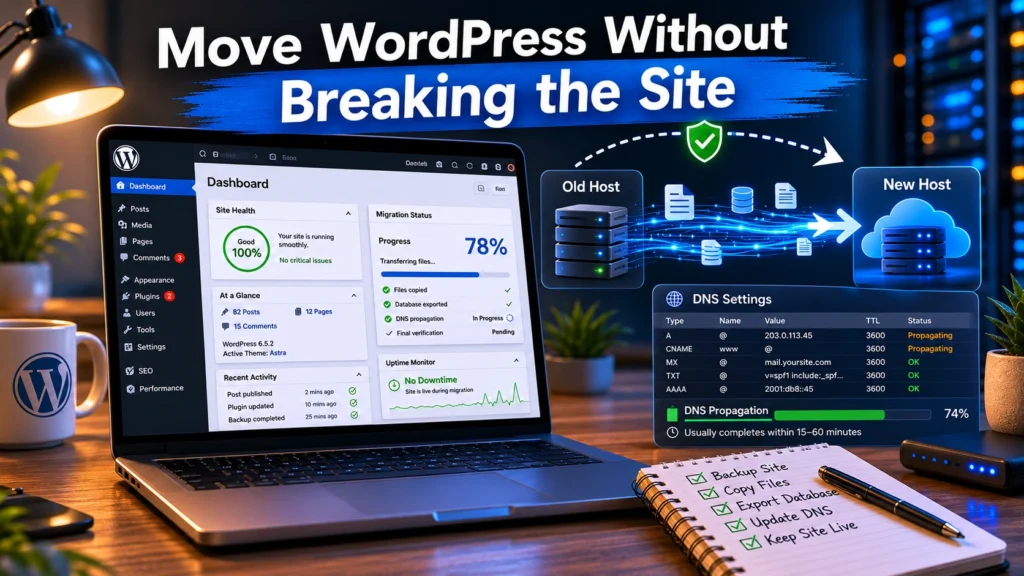
Most WordPress migrations fail in boring ways. Not catastrophic hacks. Not server fires. Usually someone skipped the backup verification, changed nameservers too early, or forgot the site also handled business email. Then the homepage works, but contact forms disappear into silence for eight hours.
The migration itself is rarely the hard part. The sequence is. Backup first. Clone second. Test before DNS changes. Verify mail flow after the switch. That order prevents most downtime problems beginners run into during a site transfer.
One honest warning before you start: migration plugins make the process look safer than it is. They copy files well. They do not guarantee SSL certificates, DNS timing, email authentication, cron jobs, redirects, or mailbox routing survive the move intact.
Direct answer: how to migrate a WordPress site to a new host safely
To migrate a WordPress site to a new host safely, create a complete backup first, copy the site to the new hosting environment, test it on a temporary URL or staging domain, switch DNS only after verification, and then confirm SSL, forms, email, redirects, and caching all work after propagation finishes.
That sequence matters more than the migration tool you use.
A beginner mistake is treating hosting migration as “moving files.” It is not. Your domain registrar, DNS host, web host, SSL provider, CDN, and email service are separate systems. Change one layer too early and the others start failing in ways that are hard to trace.
What you need before you move website hosting
Before touching DNS records or installing a migration plugin, gather the operational details first.
| Requirement | Why It Matters | Failure If Missing |
|---|---|---|
| Full site backup | Recovery point | Broken rollback |
| WordPress admin access | Export and plugin setup | Migration stalls |
| Hosting control panel access | Database and file management | Incomplete transfer |
| DNS access | Final cutover | Site points to old server |
| Email provider details | Preserve mail flow | Lost or rejected email |
| SSL certificate status | HTTPS continuity | Browser warnings |
If your email runs through the same hosting account as the website, stop and check MX records first. MX records control where mail is delivered. Many beginners accidentally overwrite them during a nameserver change and only notice after invoices or support requests stop arriving.
That failure mode is common with bundled shared hosting.
And this is where the “cheap” host often becomes expensive. Entry-level plans usually combine hosting, DNS, and email under one dashboard. It looks simple until you try separating them later.
Step 1: create a full WordPress backup before touching DNS
Do not trust a backup you have not downloaded.
A proper WordPress backup includes:
- website files
- media uploads
- themes and plugins
- the MySQL database
- wp-config.php
- custom redirects
- email configuration references if hosted locally
Use a backup plugin, your hosting snapshot tool, or manual export through cPanel or SSH. But verify the backup actually opens and contains the database dump. Half-complete backups are one of the main reasons migrations become emergency rebuilds later.
For small sites under 5 GB, plugins like Duplicator or All-in-One WP Migration are usually enough. Larger WooCommerce stores often hit upload limits, timeout errors, or serialized database problems during import.
That is where staging copies help. A staging copy is a private test version of the site hosted separately before the public switch happens. It adds time to the process. It also catches problems before customers see them.
Use a separate inbox. Test form delivery there first.
Step 2: clone the site to the new hosting account
Once the backup is verified, build the cloned copy on the new host before changing anything public.
You normally have three migration options:
| Method | Best For | Limitation |
|---|---|---|
| Migration plugin | Beginners | Fails on very large sites |
| Manual migration | Advanced control | Slower and technical |
| Managed host migration | Commercial sites | Support quality varies |
Managed WordPress hosts like Kinsta and SiteGround often include migration assistance, but the support experience changes heavily between plans. Entry tiers usually prioritize ticket queues over hands-on troubleshooting.
This is also where you configure:
- PHP version compatibility
- database credentials
- caching settings
- CDN integrations
- file permissions
- staging URLs
(Check current version support before publishing)
A practical detail most guides skip: disable aggressive caching during migration. Otherwise you end up troubleshooting a problem that already disappeared 20 minutes ago.
Step 3: test the migrated copy before changing nameservers
This is the step people skip because the homepage “looks fine.”
Then checkout fails. Images disappear. Contact forms silently break. Scheduled tasks stop running. Or email confirmations never leave the server because SMTP credentials still point to the old host.
Testing should include:
- Frontend pages
- Login access
- Forms
- Checkout flow
- Image loading
- SSL behavior
- Mobile responsiveness
- Plugin conflicts
- Redirects
- Email delivery
Test using:
- temporary host URLs
- hosts file overrides
- staging domains
- preview environments
A strong migration setup keeps the old host active for at least 48 hours after DNS changes. That overlap protects you from partial propagation issues.
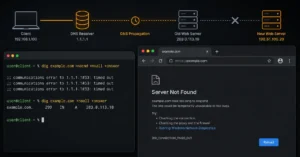
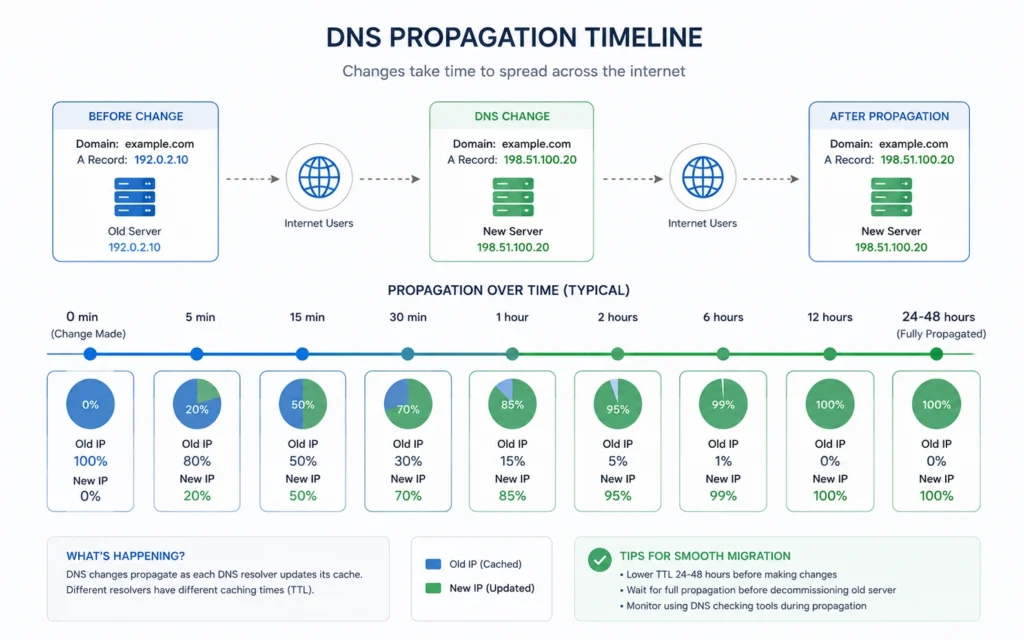
Because propagation is not instant. Recursive DNS resolvers cache old records based on TTL values — Time To Live settings that define how long DNS information stays cached before refreshing.
Step 4: switch DNS and control the propagation window
Now comes the part that feels immediate but is not.
DNS propagation often takes anywhere from a few minutes to 24 hours depending on TTL settings, resolver behavior, and ISP caching. Lowering TTL values to 300 seconds several hours before migration can reduce the transition window.
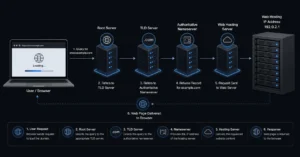
Here is the dependency chain beginners usually miss:
Domain registrar → nameservers → DNS records → hosting server → SSL → email routing
Break the sequence and the failures stack quickly.
You normally have two options:
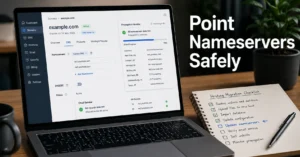
- update nameservers
- change only the A record
Changing only the A record gives more control because DNS hosting stays where it already works. Full nameserver changes move every DNS record at once — website, email, subdomains, verification records, SPF, DKIM, DMARC, everything.
That is why beginners accidentally break email during a site transfer.
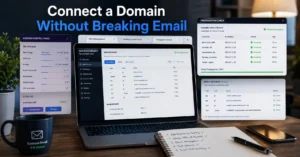
If your business email runs through Google Workspace or Microsoft 365, verify these records survive the migration:
- MX
- SPF
- DKIM
- DMARC
Without them, inbox placement drops fast. Sometimes within hours.
(Policies change without notice)
Step 5: verify SSL, forms, email delivery, and redirects
The site loading is not the finish line.
Post-migration verification is where you catch the expensive problems:
- SSL mismatch errors
- mixed-content warnings
- broken redirects
- missing media
- failed SMTP authentication
- DNS conflicts
- old CDN caches
- scheduled task failures
SSL certificates often need reissuance after migration because certificates are tied to hosting environments and validation methods.
And email deserves its own check.
Send:
- contact form tests
- transactional emails
- password reset requests
- invoice notifications
Then verify inbox placement in Gmail and Outlook — not just delivery. Spam-folder delivery still counts as failure for most businesses.
This is the blunt verdict:
A migration is not complete until both the website and the email system behave normally under real traffic.
Migration mistakes that cause downtime later
Most migration problems do not appear immediately.
They appear two days later when:
- DNS caches expire
- cron jobs fail
- cached redirects disappear
- SSL renewals break
- backup schedules never restarted
- forms route to dead inboxes
One of the most common mistakes is canceling the old hosting account too early. Keep it active for at least 5–7 days after migration if possible. Cheap insurance. Expensive lesson otherwise.
Another beginner trap is assuming the domain registrar controls hosting performance. It does not. Your registrar manages the domain registration layer. Hosting performance comes from the server environment, caching stack, database performance, and CDN configuration.
Different systems. Different jobs.
What it costs: plugins, managed migration, and staging tools
(2025–2026 rates — verify before purchase)
| Option | Price | Best For | Limitation | Verdict |
|---|---|---|---|---|
| Free migration plugin | $0–$10 | Small blogs | Limited recovery tools | Good starting point |
| Premium migration plugin | $49–$199/year | Growing sites | License renewals | Better reliability |
| Managed migration service | $99–$500+ | Commercial sites | Quality varies | Lower risk |
| Managed hosting with staging | $20–$80/month | Businesses | Higher monthly cost | Safer long-term |
The cheapest path usually costs more time. The safest path usually costs more upfront.
For beginners moving a business site, staging-enabled hosting is normally the safer default because rollback is easier when something fails.
What to do when the migration fails halfway through
Do not keep troubleshooting on the live domain while customers are visiting it.
Rollback first. Diagnose second.
Typical recovery sequence:
- Restore backup on old host
- Revert DNS changes if propagation is incomplete
- Disable caching layers
- Recheck database credentials
- Verify file permissions
- Retest email routing
- Retry migration in staging
The honest negative here is simple: most migration disasters begin with skipped testing, incomplete backups, or rushing the DNS switch because the new homepage already loads.
The better alternative is slower and less exciting:
clone the site, test privately, then switch only after verification.
That extra hour usually prevents the six-hour cleanup.
Frequently Asked Questions About Migrating a WordPress Site to a New Host
How long does a WordPress migration take?
Most small WordPress migrations take between 1 and 4 hours if backups, DNS access, and hosting accounts are ready. DNS propagation can continue for up to 24 hours depending on TTL settings and ISP caching behavior.
Will migrating hosting hurt SEO rankings?
A clean migration normally does not damage rankings. Problems happen when redirects fail, SSL breaks, pages return 404 errors, or downtime lasts too long during propagation. Testing before the DNS switch reduces most SEO risk.
Can I migrate WordPress without changing my domain?
Yes. The domain can stay registered with the current registrar while hosting changes separately. Many site owners move hosting first and leave the registrar unchanged for simpler DNS management.
What happens to business email during migration?
Email can break if MX, SPF, DKIM, or DMARC records are overwritten during DNS changes. That is why email routing should be checked before nameserver updates happen.
Should beginners use a migration plugin or manual transfer?
For small sites, migration plugins are usually safer and faster. Manual transfers provide more control but increase the chance of permission errors, broken databases, or missed configuration files if you are inexperienced
Continue Exploring
- Web Hosting, Domains, Email Infrastructure explains how hosting, DNS, domains, and business email connect before you start changing records or providers.
- beginner hosting setups breaks down which hosting environments are easiest to maintain once the migration is finished.