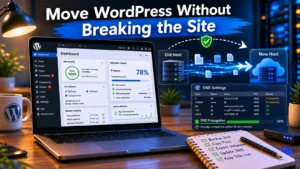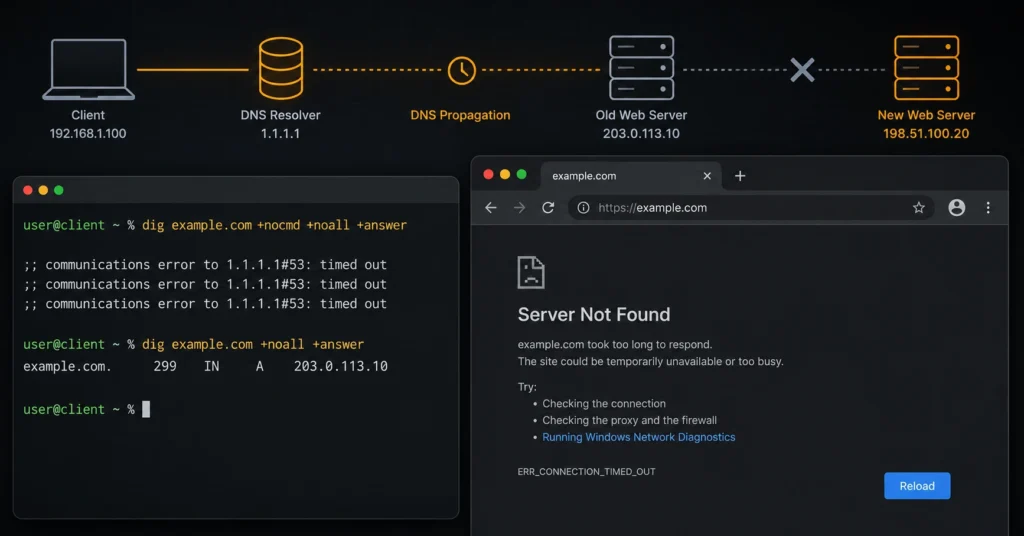
To fix a website down after a DNS change, you must determine whether the outage is caused by local network caching, incomplete global propagation, or an invalid record layout. If an external DNS lookup tool shows your correct new IP address while your browser shows an error, the problem is local cache—which you can resolve instantly by flushing your operating system’s DNS resolver or changing your device’s DNS servers to a public resolver like 1.1.1.1. If global lookup tools show incorrect values or throw NXDOMAIN errors, your records are misconfigured at your authoritative nameservers and must be edited manually to match your web host’s technical specifications.
The table below summarizes the three main causes for a site outage after DNS change, how long each takes to clear, and the explicit action required to fix it immediately.
| Issue Classification | Typical Duration | Best Diagnostic Tool | Core Fix Action | The Reality Check |
| Local Cache Block | 5 to 60 minutes | Private browser / Mobile data | Flush OS resolver cache or switch network interfaces. | Your site is actually online; your local router is just lying to your browser. |
| Global Propagation Delay | 2 to 48 hours | DNSChecker.org / LeafDNS | Wait for TTL windows to expire across global ISP nodes. | No technical fix exists during this window—waiting for propagation is sometimes the correct fix. |
| Zone File Misconfiguration | Permanent until fixed | Command line dig @nameserver | Log into active nameservers and rewrite A/CNAME rows. | The site will never return online until the string values match your server configuration. |
The Dependency Chain: Why Your Site Broke When the Records Changed
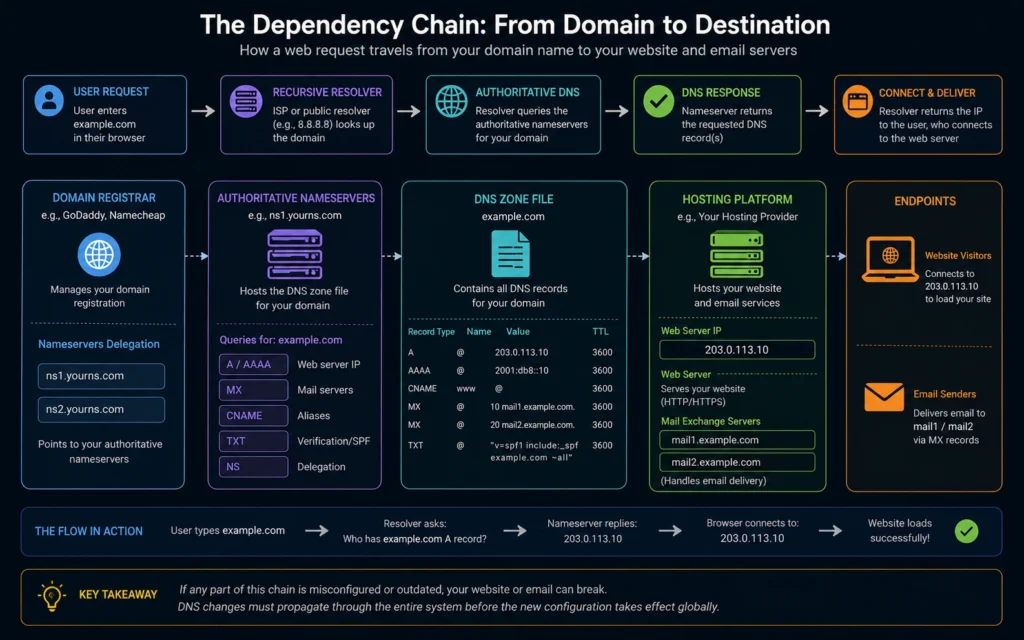
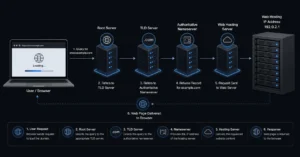
Changing your DNS settings splits your infrastructure into completely different control layers, and losing track of who manages what is exactly how sites go offline. When a customer enters your domain name into a browser, their computer asks your domain registrar—companies like Namecheap or Porkbun—where your authoritative nameservers live.
Those nameservers hold the actual DNS zone file, which acts as a master routing directory containing specific records like your A records, CNAMEs, and MX routing rules. If you updated your nameservers to point to a new web host, your entire DNS zone file moved with them—leaving your old records behind.
This transition creates an immediate failure mode if your new web host doesn’t already have your historical records pre-configured before the nameservers switch over. The moment the global nameserver change hits your internet service provider (ISP), the lookup requests point to a blank, default zone file on the new host.
[Domain Registrar] ──> Pointed to New Nameservers ──> [New Host Zone File] ──> Missing A Records ──> Browser Error
Your web server might be running flawlessly, but because the new directory does not know your server’s public IPv4 address, the browser drops the connection. This separation of powers is why changing your web host shouldn’t mean guessing at your domain settings; if you don’t map out your existing records first, your digital infrastructure drops dead.
Step 1: Check Global DNS Propagation to Isolate the Outage
Your website down after dns change might not be a real emergency; it might just be the physical reality of global data distribution. When you change a DNS record, that change does not immediately update every server across the earth.
Instead, millions of intermediate recursive routers run by internet service providers hold onto your old records based on the original Time to Live (TTL) setting—a value measured in seconds that dictates how long an old record remains valid.
To verify what the rest of the planet sees, open an external checker like DNSChecker.org or digwebinterface.com. Enter your apex domain (e.g., yourdomain.com) and select the A record lookup from the dropdown selector.
- If green checkmarks appear next to global nodes showing your new web hosting IP address, your configuration is completely correct.
- If the nodes display your old hosting IP address, the system is simply performing a standard transition—an honest negative where the site looks down to you, but is merely working its way through network nodes.
- If the checker returns a sea of red errors or an
NXDOMAINstate, your authoritative nameservers are serving dead data, meaning you have an active configuration error that requires manual intervention.
Step 2: Clear Your Local Cache to Bypass Stale Network Data
If global checkers confirm your new IP address is live everywhere else, your local machine, web browser, and home router are simply hoarding stale DNS data. Your operating system preserves a local directory of domain lookups to speed up load times, which means your computer will keep hammering your old, dead web hosting account until you clear out that internal database.
To execute a complete DNS propagation fix on your personal workspace, you need to force the operating system’s resolver cache to drop its records completely. Close out your active web browsers and open your computer’s command interface.
For Windows environments, open Command Prompt as an administrator and execute this specific syntax:
DOS
ipconfig /flushdns
For macOS deployments running current updates (Check current version support before publishing), open the Terminal utility and run the administrative flush string:
Bash
sudo killall -HUP mDNSResponder
Once the terminal returns a success message, bypass your home router entirely by turning off your Wi-Fi interface and testing the domain access on a mobile device utilizing cellular data networks. If the site loads instantly on your mobile network, your network equipment is simply holding onto the cached records until its local TTL counter hits zero.
Step 3: Match the A Records and CNAMEs with Your Web Host
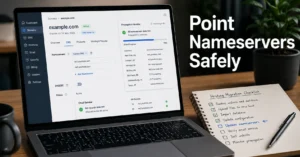
When global lookups fail or return incorrect data, you must repair the records inside the dashboard of whichever company controls your authoritative nameservers. If you left your nameservers pointed at your registrar, make your changes there; if you pointed your nameservers to Cloudflare or a specific web host like DigitalOcean or SiteGround, you must open their control panel instead.
Log into your web hosting account and locate your public server address—this is a static, four-part numerical string known as an IPv4 address (e.g., 192.0.2.1). Copy this value directly, then open the DNS Zone Editor of your active nameserver provider. You must ensure two structural elements match this address exactly:
- The Apex A Record: The record labeled with the
@symbol or your blank root domain name must be configured as an A record pointing directly to that server IPv4 string. Do not appendhttp://or trailing slashes to this field. - The WWW CNAME: The record labeled
wwwmust be configured either as an A record pointing to that same numerical IP address, or as a CNAME record pointing directly back to your root domain name.
Type: A     | Name: @   | Value: [Your Server IP Address] | TTL: 3600
Type: CNAME | Name: www | Value: yourdomain.com            | TTL: 3600
Setting your TTL to 600 or 3600 seconds during this setup phase ensures that if you commit a typographical error, you will not have to wait a full calendar day for the corrective fix to propagate through the web again.
Common Configuration Mistakes and Exactly How to Avoid Them
The single biggest mistake small businesses make during website troubleshooting is running concurrent DNS modifications inside two separate account panels. If your domain registrar points to Cloudflare nameservers, typing new records into your old GoDaddy portal does absolutely nothing.
The web completely ignores any zone files sitting on servers that are not explicitly marked as your active authoritative nameservers at the registry level.
Another common point of failure is stacking multiple conflicting A records under the same host name. If your DNS panel contains one old A record pointing to your previous Shopify store and a second A record pointing to your new WordPress VPS, the internet will randomly split your traffic between them.
Browsers do not treat multiple A records as a backup failover system; instead, they alternate requests across both entries via round-robin distribution. You must completely delete any legacy A records from your previous hosting configuration to ensure that 100% of incoming user requests map exclusively to your current server destination.
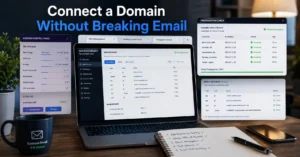
Troubleshooting What to Do When Your Business Email Breaks Too
When web infrastructure changes break your email deliverability, your corporate communication lines can drop instantly. Moving your nameservers to a new provider wipes out your MX (Mail Exchanger) records, which are the specialized rows that tell global mail servers where to send corporate messages.
If your MX records vanish or point to your new web host by mistake, incoming emails will immediately bounce back to the sender with a fatal delivery failure error.
To restore your business email flow, you must manually bring over your authentication rules from your previous DNS setup. If you run your organization on Google Workspace or Microsoft 365, you must re-add the exact verification records required by those communication providers. For instance, Google Workspace accounts require an MX record pointed to SMTP.GOOGLE.COM with the priority tier set explicitly to 1.
Beyond just receiving mail, your outgoing messages will instantly trip spam filters if your text-based security records are left out of your new zone file. You must add these three specific protocols to your new active DNS manager to maintain domain trust:
- SPF (Sender Policy Framework): A TXT record containing a string like
v=spf1 include:_spf.google.com ~allthat verifies which servers are authorized to send mail from your domain name. - DKIM (DomainKeys Identified Mail): A unique, cryptographically generated public key entered as a TXT record that prevents bad actors from spoofing your sender identity.
- DMARC (Domain-based Message Authentication, Reporting, and Conformance): A policy rule (e.g.,
v=DMARC1; p=quarantine) that tells receiving mail systems what to do if an incoming message fails your SPF or DKIM verifications.
If you don’t take these steps, your web traffic might recover while your critical business invoices drop straight into your clients’ junk folders. For deeper operational tutorials on maintaining structural health for your domain assets, you can review our tactical manual covering foundational Web Hosting, Domains, and Email Infrastructure management.
Frequently Asked Questions About Website DNS Failures
Why is my website still down 24 hours after a DNS change?
Your old DNS provider likely had a high TTL setting, forcing internet service providers to cache the old location. If global propagation tools show the correct new IP address, your local router or ISP is still holding the expired record. (Policies change without notice).
Can a wrong DNS record break my corporate email delivery?
Yes, changing nameservers completely wipes out your existing MX, SPF, and DKIM records unless you copy them over first. If your mail routing breaks, incoming messages bounce back to senders immediately, dropping your business deliverability to zero.
How can I check if my DNS records are correct without waiting?
Use a command-line tool like dig or nslookup targeted directly at your specific authoritative nameserver. This approach bypasses local ISP caching entirely and returns the actual record currently sitting on the live nameserver, allowing you to confirm your setup status instantly.
Should I use my domain registrar or my web host to manage DNS records?
Use a dedicated Anycast DNS provider or your domain registrar for optimal flexibility. If you couple your DNS management directly to your web hosting account, your entire network routing environment goes dark if that specific web server suffers a physical hardware outage.
Continue Exploring
Web Hosting, Domains, and Email Infrastructure Review our central architecture workspace to see how to align your domain registrars, nameservers, and mail configurations safely before executing your next infrastructure cutover.